Friday, May 28, 2010

#6 A little beer is always good….

So what’s the Mexican staple we can’t live without? ….the pair that can’t do without each other, the Romeo and Juliet of all fajitas - it’s beans and rice. I know what you’re thinking – Why couldn’t I just crack open a can of refried beans and cook up a box of Spanish rice? Is it really that necessary to go to all the trouble? Umm… I guarantee you will never go back to the off-the-shelf dregs once you’ve tried this. My version adds so much more flavor than your traditional Mexican restaurant. …and one of the perks – you get to drink the rest of the beer that you don’t use :)

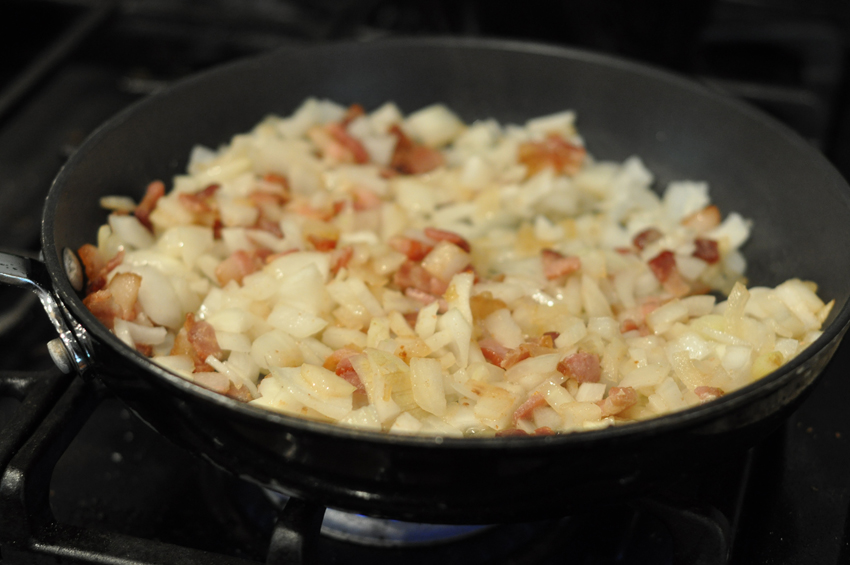
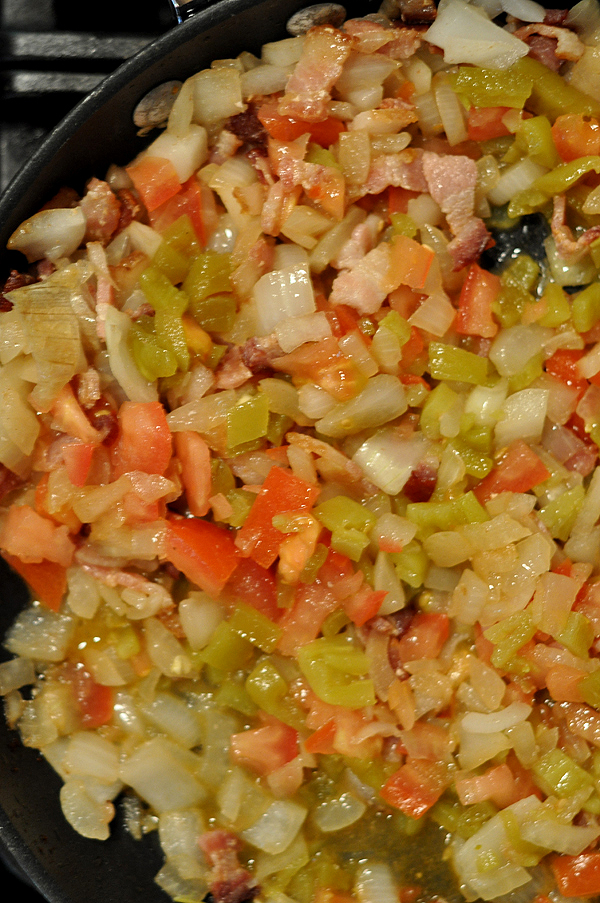
It really doesn’t take that long either. Maybe 5 minutes of prep time for the rice and 10-15 for the beans (and soak the beans overnight) – I usually put it on during lunch at the house and let it cook the rest of the day while I’m at work. Here’s some tips to my recipes – fry the bacon a little in the pan first then drain out some of the fat. Add the onions in and let them fry a little till translucent.


…then I added the diced tomatoes to the pan to let them cook out a little as well. I feel that pan frying give it some flavor before going into the slow cooker. It’s so colorful and almost makes you want to spoon it over chicken and dive in (and in case you noticed, i added a small can of chopped mild green chilies to the pan as well - it's not in the recipe because i had it in the cabinet and just thought it would taste good).

beans5

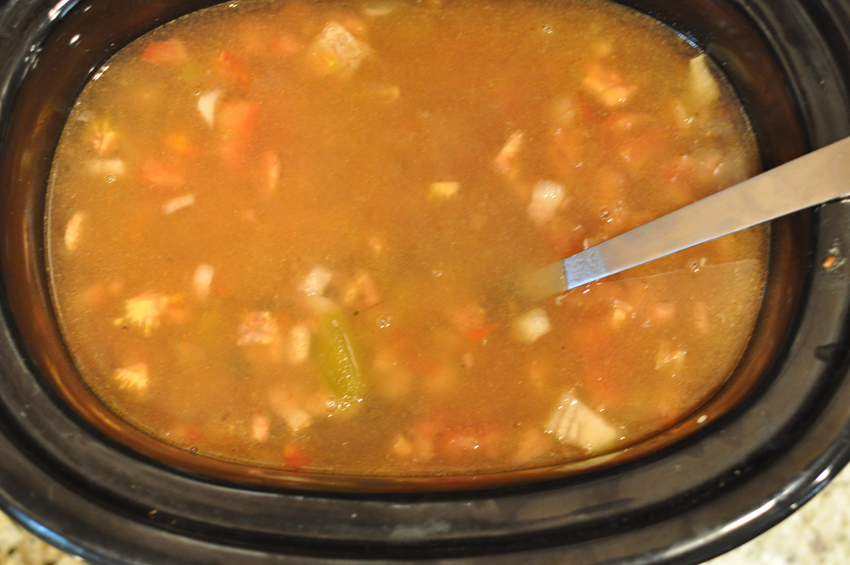
Once you’ve cooked all that a little, dump in into the slow cooked with the beans and water. Dump in the Rotel as well with all the spices and just let it cook away on low. Not until about 30 minutes before you eat do you need to add the cilantro and beer. I used Bud Light Lime – something you wouldn’t mind drinking afterwards because you will have some left over.


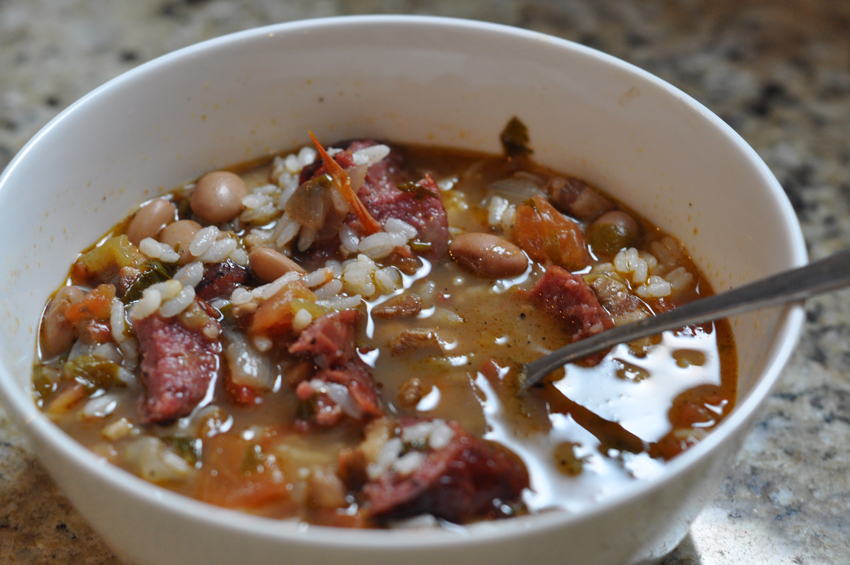
Forgot to take a picture that night because I was so vested in eating the food – so here’s a picture the next day :)


Borracho Beans (Drunken beans) – almost like a bean soup
1 lb. pinto beans, uncooked
4 bacon slices, chopped
½ Tbls chopped garlic
1 onion, chopped
½ Tbls cumin
½ Tbls chili powder
1 ½ Tbls salt
2 Roma tomatoes, chopped
1 bunch of cilantro, leaves chopped
1 ½ cups of beer

Soak beans in water for 8 hours. Drain when ready to use.

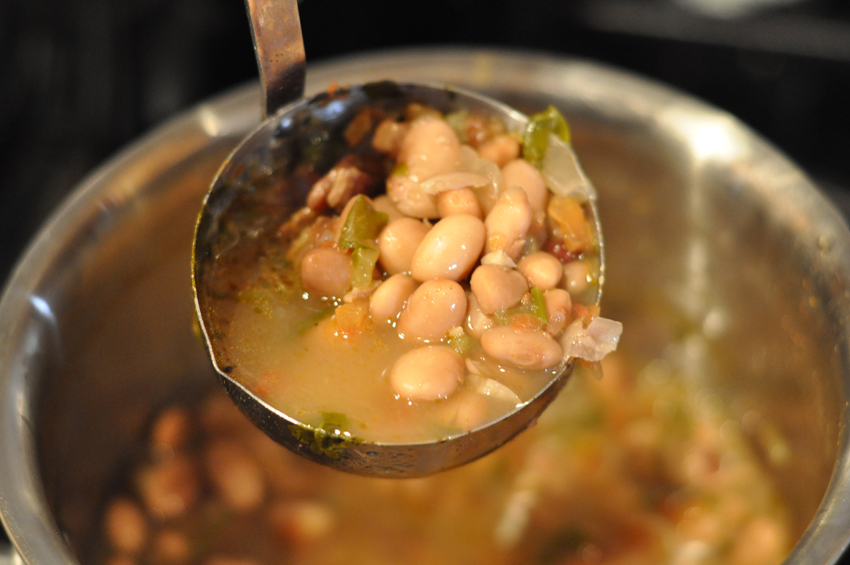
Place beans in slow cooked and add water to cover beans (I usually add a little more water as well because I like using it for Mexican gumbo too – see below). Set to low.

In a skillet, cook bacon until a lot of the fat has rendered. Discard ¾ of the fat and add the onion to the pan. Cook for 5 minutes. Add tomatoes and garlic – cooked for another 3 minutes. Add to slow-cooker. To slow-cooker, add in spices and cover. Cook for 5-6 hours.

30 minutes before serving, add chopped cilantro and beer to slow-cooker. Add salt if necessary. Enjoy!

Leftovers are even better the next day. What’s equally scrumptious is my Mexican Gumbo – just cook up a little white rice and grill a whole sausage. Chop into a bowl with the white rice and the Borracho beans and you’re good to go. Yummmm!!!!


Spicy Spanish Rice
1 tablespoons vegetable oil
1 cup uncooked white rice
1 onion, chopped
1.5 cups water
1 (10 ounce) can diced tomatoes and green chiles (Rotel)
2 teaspoons chili powder, or to taste
1.5 teaspoon salt

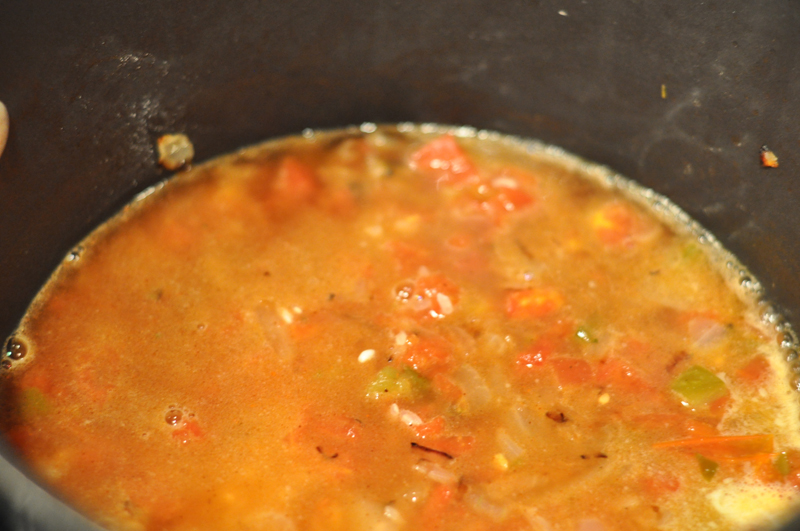
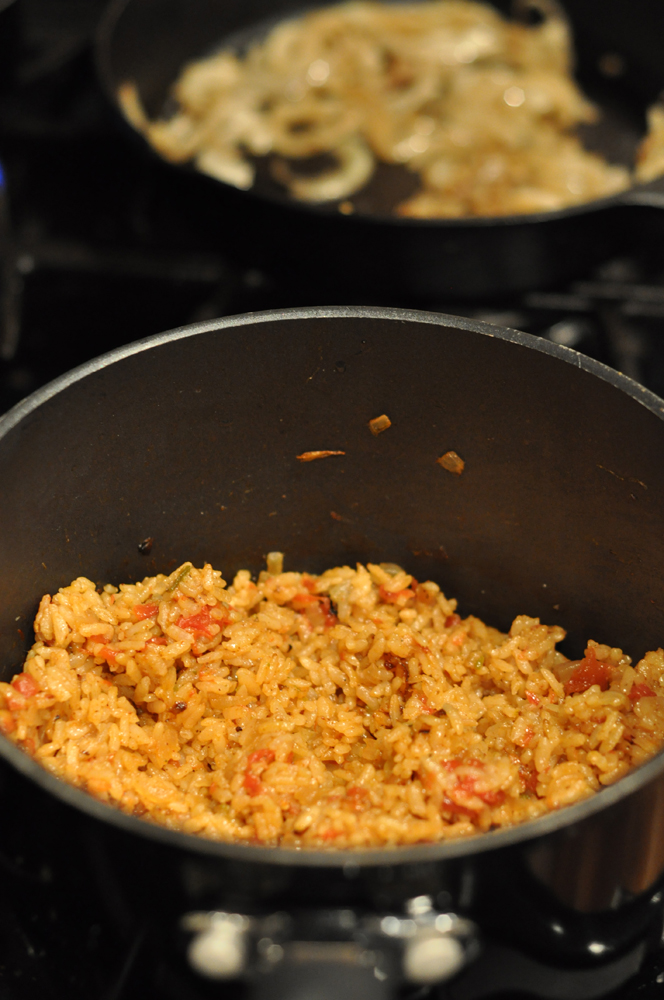
With your medium saucepan, fry the onion in the oil until slightly browned. Add the rice and cook for a minute. Stir in water and Rotel. Season with chili powder and salt. Cover, and simmer for 30 minutes, or until rice is cooked and liquid is absorbed.


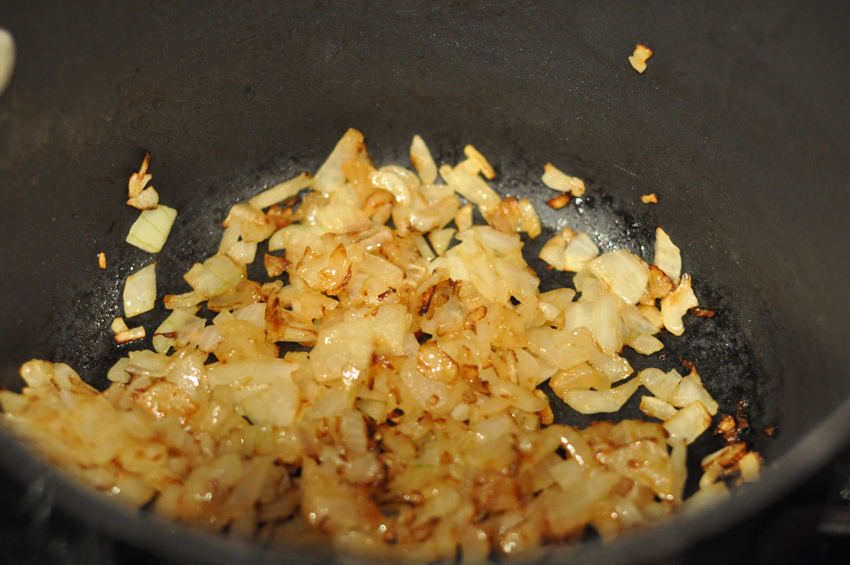
The rice is a snap to make – as the pictures entail, cook the onions a little beforehand in the same pot. Then add the Rotel, rice, water chili powder, and salt – then just simmer away!


Just posting this is making me hungry!

Stay tuned for the world’s best Fajitas – it’s soon to come once I find the time to write it.

rox

Wednesday, May 26, 2010

#5 "Magic" Vanilla Ice Cream


I’ve often praised the merits of Cooks Country magazine…my go-to magazine for all things cooking. I like this publication because it features “normal” food, extensively tested, and expertly prepared. Any cook with moderate cooking skills can follow any recipe and it will turn out fantastic.

In the June 2010 issue, they featured a recipe for vanilla ice cream that required no ice cream freezer. I love homemade ice cream but I’ve never been interested in having another rarely used bulky appliance to store.

The outcome was delicious. I made a chocolate sauce to go with it, but the sauce proved unnecessary. My tasters felt like the tangy vanilla stood on its own just fine. Also, the ice cream was at perfect “scoop” consistency at 8 hours.

Below is my version of the recipe published in Cook’s Country. Please go buy a copy of the June 2010 issue to read for yourself their take of how this came to be. Or better yet, subscribe! You will not be disappointed.


Magic Vanilla (Toni's version)
2 T of Ghriradelli white chocolate chips
½ c of fat free sweetened condensed milk (as if fat free matters…puhleeze)
¼ c sour cream (no more! It’s tangy enough.)
Pinch of salt
1 T of vanilla extract
1 ¼ cup of heavy whipping cream

Put the white chocolate chips and the sweetened condensed milk into a medium microwavable bowl and cook for 30 seconds. Remove and ensure the chips are completely melted by stirring. Then add the sour cream, salt and vanilla to that mixture, mix well. Set aside.

Beat cream with mixer until soft peaks form. Take about half of the cream mixture and mix with the condensed milk mixture. Then fold in all the rest. Mix just to incorporate, don’t go crazy.

Spoon into a quart size dish and place in your freezer. Wait about 8 hours to scoop for perfect consistency ice cream, or of course, freeze overnight. Keeps about two weeks.

Optional (but good!) Fudgey Sauce
¾ c of whipping cream
Pinch of salt
1 T of light corn syrup
6 oz of semi-sweet or bitter-sweet chocolate, chopped. Chips will work here too.
1 t of vanilla

Heat whipping cream, salt and corn syrup on medium heat till very hot but not bubbling or scorched. Take off heat. Add chopped chocolate and stir till melted. Then add vanilla. Let cool to almost room temperature before pouring over ice cream.


toni

Monday, May 24, 2010

#4 Butter, Baby!


So what can make any grilled, seared, roasted, or braised item taste even more divine? ….butter – but not just any butter. This is the mac-daddy of all butters and you will not be disappointed. One of my favorite restaurants is Pappasito’s Cantina in Texas. They serve this buttered form of crack with their Fajitas, which is a culinary experience all to itself.


PAPPASITO'S BUTTER DIP SAUCE
Source: Texas Monthly

1 lb butter
1 lb margarine
1 big heaping tablespoon granule chicken bouillon
2 tablespoons finely chopped garlic (I use the stuff out of jar)
1 cup white wine (Chardonnay is best)

Get butter and margarine room temp. Mix all but the wine together (can use an electric mixer) which will end up a peanut butter texture. Slowly blend in the wine – this is the tricky part. Do not use the electric mixer at first because it will slosh everywhere. Just mix it slowly with a spatula. It may seem like it will never incorporate, but give it time. After all is smooth and blended, empty, tube style, onto plastic wrap and roll up:


After it’s hardened in the fridge, I usually cut up into 4 rolls and freeze the ones I’m not using. It’s GREAT on all meats for dipping or basting.

When you get ready to use, cut off sections. Put in bowl to microwave for 10 seconds at a time until you see it froth. Stop and serve there as if you allow to go further, the butter will separate.

butter04


rox

#3 Simple Outdoor Meal on a Plain Old Saturday Night


I love Whole Foods. I mean, I love it as much as, Anthropologie . That’s some high praise. It’s the kind of place I could easily spend an hour or more in…going down every aisle, reading labels, impulse buying. It’s my Costco.

So I’m there and get these chicken Italian sausages…and from the bakery some roasted garlic bread…and these little lemon mini Bundt cakes (all natural and only 120 calories)…wait, I need Greek yogurt.

What’s for dinner tonight? How about grilling up some of those sausages crisp, add some pasta & sauce. How’s that basil coming in my herb garden? Looks good, let’s add that. Wait a minute; let’s warm that bread on the grill. Ready to eat. Yep. In less than 20 minutes. It’s a nice night, let’s take this meal outside.

For dessert, a mini Bundt cake, some fresh berries and Greek yogurt. This is a good life.
toni

Thursday, May 20, 2010

#2 An Apple a Day...

peach1

I’m not saying fruit trees are going to cure cancer, but they’ll sure make any backyard more enjoyable. Every time I walk into my backyard, I smile. But get the dwarf variety – a regular apple or peach tree will take up your whole yard very easily. …and I really don’t have all that big of a yard. As long as you’ve got some sun and good drainage, they’ll grow.

Here's some tips I've learned:

1) Get the fruit trees from a local store. I bought the apples, peach and figs here in Memphis. …but I bought the Cherry in Texas. I should have known better, but it died over the winter.

2) Read the tag before you buy it. My dwarf peach and apples are self pollinating – some aren’t and that means you’ll have to buy 2 varieties of each tree so that they pollinate each other.

3) In terms of caring for fruit trees, it’s not that hard. When you first get them as babies, I would wrap the trunk with a white plastic-like protector. You can find it in the backyard section of Wal-Mart/Home Depot. It helps prevent against splitting, cracking, winter frostbite, and sun scalding. I read online you can also use a white latex paint, but I just used the store-bought wrap.

4) For young trees, I would also stake the ground with a rope connected to the tree trunk on 2 sides. This helps them grow straight – but do it loosely and remember to remove it after the first year or the tree will literally grow around the rope/twine.

5) …also, pick off all the fruit within the first couple years. You want the trees to put all their energy into the root system at first (not into the fruit). If you do this, you’ll have a stronger tree in the end.

Lastly, yes – birds are sometimes a problem. My first year with the doomed Cherry, I had literally 2 cherries and they were gone within the day. Should have picked them…


peach2

This is my apple tree (below) – It’s a little of my problem child of the bunch. See those orangey rust spots on the leaves? Unfortunately there’s a cedar tree in a nearby backyard which carries the fungal disease. There’s not much I can do. They say the best remedy is to remove the cedar/juniper trees, but I'm not going to be climbing the fence with a hacksaw anytime soon.

applejpg

I’ve got 2 figs as well and I love them (a Celeste and a Brown Turkey). They’re filled with figs but usually aren’t ready until late summer/fall. Those little green nubs below are the baby figs….

fig

As a way to make my ‘orchard’ feel a little more comfy, I made hang tags for all the trees. I just took some pottery clay and rolled it out thin then draped it over bowls to give it character.

sign

Everything is labeled in my backyard including the herb garden, but we’ll get to that at another time. …but just a word of advice before then, do not plant Peppermint. It grows everywhere:
peppermint

Yes, it smells like Peppermint when I mow…
rox

Tuesday, May 18, 2010

Lagniappe: Strawberry Pickin' Time

straw 1

Grandmother used to say that May was strawberry picking month and “don't buy them before then because they won't be no good." I can recall as a child going with her to the farm in a big green Impala with the floral upholstery and picking our own. We'd take a big basket, pick a few quarts of berries, the farmer man would weigh them, we'd pay, and then off back home to make jelly.

To be able to do this with my own child via the Jones Orchard folks at the Agricenter took me down memory lane. That big ole box of strawberries pictured here that the Little Man picked cost a mere $3.50. And no jelly for us as I don't know how to "put up" any berries as Grandmother used to say...but I sure do make a delicious strawberry shortcake. Down South, we like ours with vanilla ice cream and whipped cream—just wait till May to eat one (or two).

straw 2

toni

Lagniappe: Strawberries Romanov

Strawberries Romanov

Of all the restaurants I wish would come to Memphis, the one at the top of my list would be La Madeline. And I would forgo all others for this one "French cafeteria." But as they say, if you can't beat, join 'em, so I re-created their signature Strawberries Romanov dessert based on a recipe site I recently visited and I could tell no difference from the original. Perfect, light summer time dessert.

Here it goes (serves about two people):
1 c of washed and hulled strawberries, I prefer them chilled
1 c of sour cream
3 T of brown sugar
1 T of brandy (and I didn't have brandy so I used Cointreau and couldn't tell the difference)

Mix sour cream, brown sugar, and brandy. Let sit a few minutes in fridge and then stir again. The sauce will be tan color. Place strawberries in a crystal goblet and spoon sauce on top.
toni

Friday, May 14, 2010

#1 The Judy Bench

Better Back Porch Shot

I have an elderly neighbor who has a lovely backyard garden with winding paths, random statues of whimsy, a fountain, plants of all varieties, and sigh, a courtyard. My dream! We call it the Secret Garden. It’s never locked and she lets us come and go as we please and my son loves it. Her house was the first I hit when my neighborhood association had their annual garage sale. I picked up this black bench for $7. I thought I could do something creative with it.

bench before

Mallet

It sat around for a few months and one day when cleaning out the garage, I found some old glass from a long ago stained glass class. I had completely forgotten about that glass which happens when clutter accumulates. I then called my friend Judy who had just completed a mosaic table and asked if she could teach me the basics…I had a bench project.

Pattern Set Up


bench before grout


She showed me how to smash the glass with a mallet between towels, and then lay out the pattern. Glue it down, then grout. I found some Dollar Tree marbles as a border accent. We chose a black grout and she taught me how to mix it right-a cake batter consistency. We let it dry a few days then used a sealer solution all over it.

bench after grout

I can’t tell you how much I love this Judy Bench. The whole thing cost less than $20 to put together and it’s the centerpiece of my back porch. I’ll keep it forever.

toni