Friday, July 30, 2010

Lagniappe: Quick & budget friendly bathroom renovation

I’m a renovation addict. …well, I’m more of a penny pincher, so do-it-yourself renovating comes naturally. Instead of posting nothing else this week, figured I'd at least give you a glimpse into my life....

Long story short, I’m trying to sell my house and I’ve renovated most of the place except for the 2nd bathroom. The tile, tub, and toilet in that bathroom are perfectly fine. What’s outdated is the cabinet, countertop, and fixtures (what you can’t see is the countertop was originally a 70s yellow. I painted it as soon as I moved in 5 years ago). I’m going to show you a simple and cost effective solution for the everyday homeowner .

…so Fred (my fiancé) and I already knew that we couldn’t afford granite at the moment. It averages around $45/sf where we live and I know I’m already not going to get all my money back out of my house (due to the plummeting housing market). Here’s a word of advice that my father always tells me – “Roxane, you don’t make money on the selling of a house – you make money on the buying of it”. In even simpler words - don’t jump into buying a house and don’t think you’re going to make a ton of money off of it. Really evaluate the market and its potential before you buy it. Just because you sink money into it, doesn’t mean you’ll get it back out when you sell it.

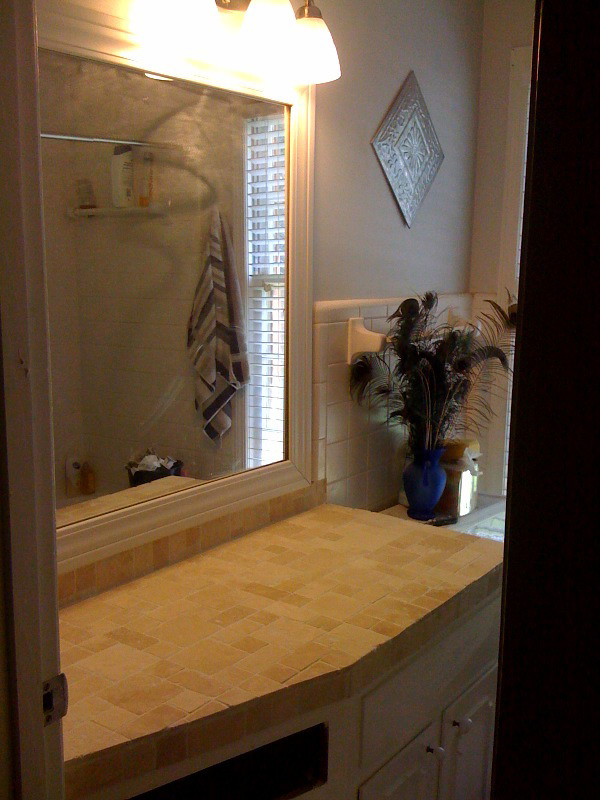
First thing is to replace the countertop. Here’s a ‘before’ picture I took on my phone:

counter

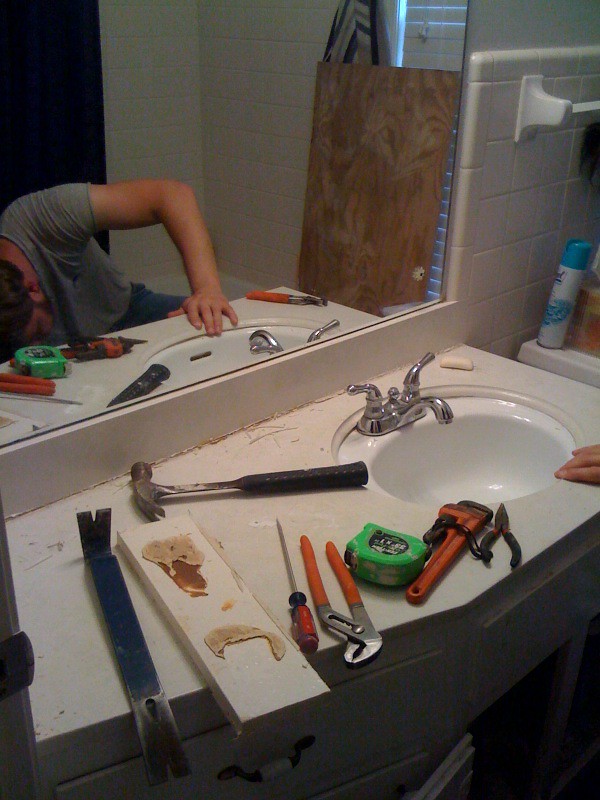
We’re removing the sink – so we just disconnected all of the plumbing, scored around the edge and unscrewed the sink clip underneath. From there, it will just drop down when it’s loose.

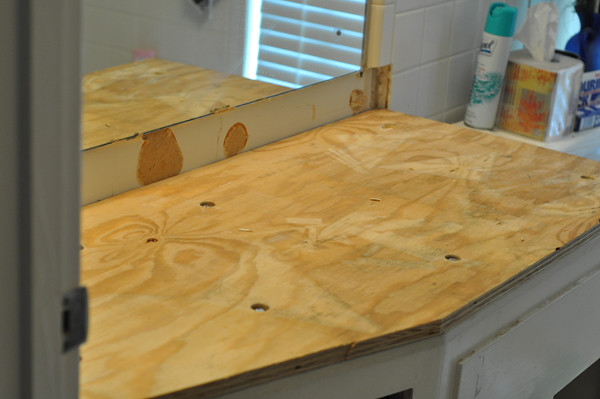
Next is the plywood top. Since I’m going to tile over it, it’s recommended you use at least ¾” thickness plywood. We cut it to the exact same size (had to sand slightly on the edge because we cut it a hair large). I scored the original top (because I had painted it) and then added a bonding agent (liquid nails, etc). Once we glued the wood down, we also dropped bolts into the countertop to make sure it’s all sturdy. …and since we want the counter to not have bumps from the top of the bolts, we countersunk all of them as well (this means we drilled one hole for the bolt, then another for the washer and head of the nail). See picture below.

reno4

Now to tiling! I chose a mosaic travertine since I really only needed 10 tiles – you could go even cheaper if you wanted to. The trowel I used is a ¼ x ¼ x ¼ …and I’m also using a white thinset to better match in case I’m messy. Before I even spread on the thinset, I cut and dry-fit all of the tiles:

reno5

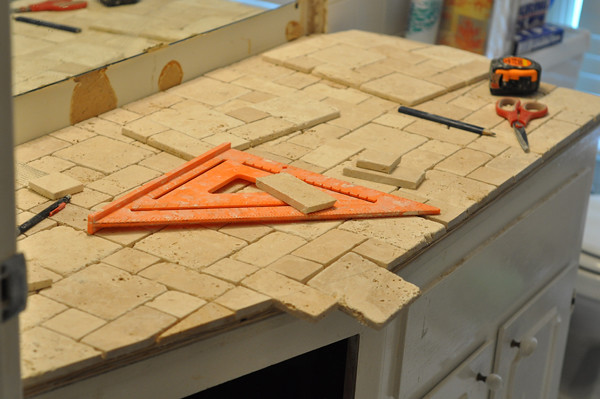
Then just placed the tile sheet on top with a small squish to make sure the tiles made good contact:

reno2

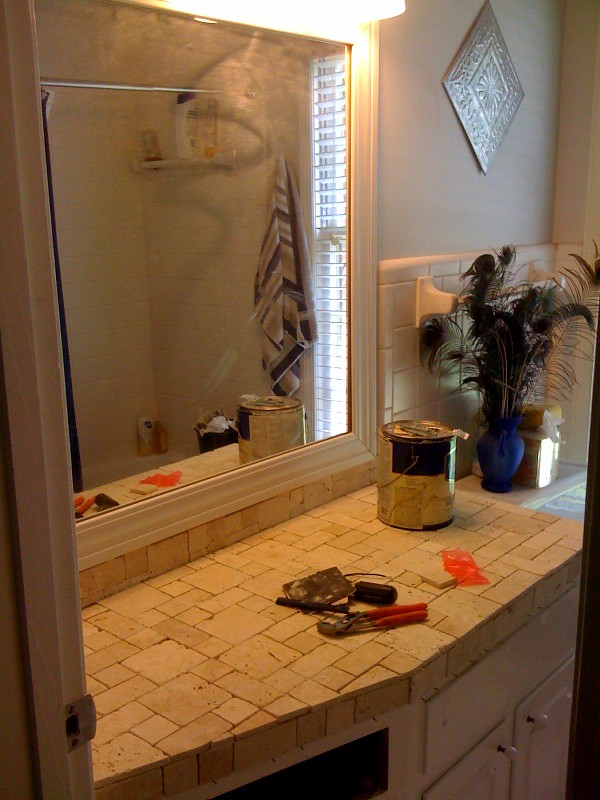
Next is the grout – After you’ve waited 24 hours for the thinset to dry, you’re ready to grout. Make sure you get it into all the cracks and crevices. Then wipe off any excess. The day after, keep sponging down the countertop so you don’t have any residue left:

reno3

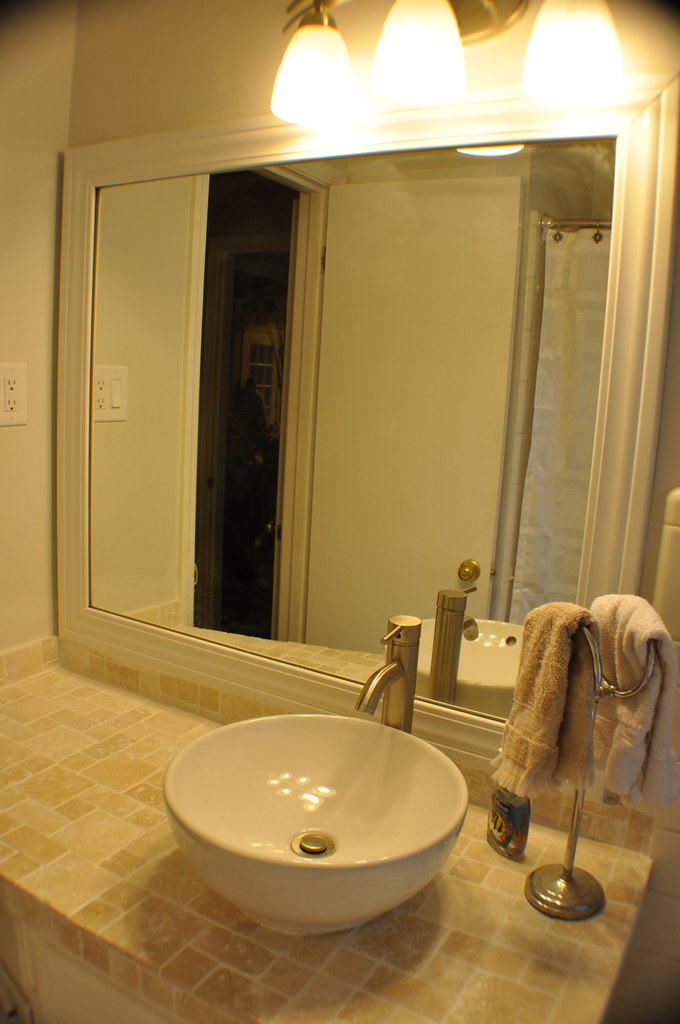
So we’re almost done! In addition to the countertop, I also wanted to replace the light fixture and update the mirror. For the mirror, just take a couple sticks of casing from the home improvement store and cut to length. Then with mirror glue and a caulking gun, affix to the mirror. I used a little painters tape to hold it in place while it dries. …then a coat of fresh paint and you’ve got a beautiful bathroom:

bath2

…and view of the mirror surround:

bath2b

Total spent:
$5 - ½ sheet of plywood
$68 - 10 travertine tiles
$0 – Thinset (I was tiling my other bathroom and really only needed a couple scoops out of the big bucket
$15 - Grout
$65 – vessel sink
$50 – vessel sink faucet and pop-up drain
$18 - Casing trim around mirror
$30 – new light from Costco
------
$234

rox

Tuesday, July 27, 2010

Lagniappe: Some fish for fun


This weekend I had a big craving for Fish Tacos. I had seen a Martha Stewart episode (love her!) a couple months ago featuring the ones from La Fondita in the Hamptons - they looked delicious and couldn’t stop thinking about them ever since.

Truth be known though, I really hate frying. It gets hot in the kitchen, the fear of grease splattering plus the mess to clean up afterwards – it’s just not something I ever enjoy. I thought for sure I’d get over it for bite of these tacos …and I still hate it.

…but the tacos are good. I borrowed the recipe posted on Ina Garten’s website although I had to make a little adjustment. The batter was way too thick, so I cut down on the flour (instead of the original 1.5cups, I changed it to 1cup). The original recipe also suggests Mole Negro Dark as the beer – but it was $15 bucks for a six pack – completely not worth it. Exchanged it for Dos Equis Dark for half the price and I bet no one could tell the difference.

So for me, the best part of the recipe was the Chipotle Mayo – easy to make and I just poured it into the squeeze bottle afterwards to dispense and store….


For the fish, I used cod, which is traditional for a fish taco…


ack, the frying! Makes me nervous even looking back at my pictures…


La Fondita Fish Tacos
Courtesy of Barefoot Contessa

3 eggs, well beaten
8 ounces dark beer, such as Modelo Negro
2 teaspoons Coleman’s dry mustard
1 tablespoon red chili powder
Kosher salt
1 teaspoon sugar
1 cup all-purpose flour, plus extra for dredging
1½ pounds codfish, cut into serving pieces
Vegetable oil, for frying
2 tablespoons olive oil
8 white corn tortillas
Chipotle Mayonnaise (below)
Shredded cabbage

Place the eggs, beer, mustard, chili powder, 1 tablespoon salt and sugar in a medium bowl and mix until smooth. Add the flour and continue mixing until it is somewhat thin.

Heat the vegetable oil in a deep fat fryer or Dutch oven to 375 degrees. Dip the fish into the batter and fry until golden brown. Spread each tortilla with a tablespoon of chipotle mayonnaise and place a piece of fried fish on top. Add some shredded cabbage and serve.

Chipotle Mayonnaise
1½ cups mayonnaise
1½ tablespoons fresh lime juice
1½ tablespoons chopped fresh cilantro
2½ tablespoons chipotle chili puree
Pinch of kosher salt

Mix the mayonnaise, lime juice, cilantro and chipotle chili puree together in a medium bowl, add the salt and mix again.


rox

Saturday, July 24, 2010

#21 Yard Embellishments

We've been cooking so much lately...but know that I have not lost sight of the constant yard improvement projects (translation - go to bank and withdraw lots of money).

Take for instance the kid chalet, it has now been adorned with a bridge I got, at of all places, Big Lots - and I painted it red. My son still won't play in it, but I for one just love looking at it. In fact, we're thinking of renting it out for $1,000a night--much like that ridiculous minus 32 degree igloo that people sleep in in Switzerland that has no electricity, running water, or food. The only warmth is the Everest sleeping bag they give you. In our chalet, you can sleep on the ground, one person can stand up provided they are not taller than six feet, and you can experience humidity and mosquitoes like our ancestors did. Any takers? What? No interest in rustic charm down South?


I also picked up this kid-size red picnic table at the Red Fish Gallery on North Main for a mere $50 which I thought was a good deal because this thing is HEAVY.


And plant wise, I was delighted to see that my gladiolas are coming up...I really didn't think they would as I have such poor drainage in the back. Ahhh so pretty.


I've also purchased a fountain at Water Works but the thing is just not photographing well so more to come on that and hopefully a picture too.
toni

Wednesday, July 21, 2010

#20 Charred, please....

pesto1

So things are absolutely crazy with me right now. All of last weekend was spent in Houston with wedding planning and a family reunion in the mix. Then we come home to 2 unfinished houses. Every day has been spent at my house trying to finish the home improvements so I can get it on the market to sell. …plus that coupled with my boss leaving, a disagreement with my mother, and a need to lose 20 lbs for a wedding dress, I really didn’t want to hassle with dinner.

This pesto is easy and spices up chicken very well. You literally just slap the chicken on the grill (remember to salt and pepper it) – wait 4 minutes and turn, then baste the other side with pesto and cheese and wait another 4-5 minutes.

I always roast the poblanos outside because the kitchen gets too hot trying to roast them in the oven (at 425). Just lightly oil them and turn them every couple minutes.


pesto1b

To get the skin off, simply take your knife and scrape the outside. All of the char pretty much comes off and you’ve got great flavor left behind.


pesto2


Pulse it all in the food processor and you’re done.

pesto3


Here’s a trick to those on a diet – always pound out your chicken first. Place the chicken on a chopping block and cover it with plastic wrap. Pound it out thin so it has more surface area. This will allow the chicken to cook evenly and fast - and it also tricks your mind into thinking you’re eating more (covers the plate better). Remember to Salt and pepper the chicken before cooking...

So after you’ve cooked the chicken for a few minutes on 1 side, flip and cover with pesto then with cheese. Close the lid and cook for a few more minutes and you’ve got spicy cheesy chicken.

pesto5

pesto7


Blackened Poblano Pesto

4 green poblano chiles
2 cloves garlic, trimmed
Handful of cilantro, (about 1/2 cup)
2 tablespoons toasted pine nuts
2 tablespoons extra-virgin olive oil
1 teaspoon kosher salt
1 tablespoon balsamic vinegar

Blacken chiles on the grill or over the stove (or in a broiler) until blackened on all sides. Place on a chopping block to cool (Do not steam in a bag; they should remain somewhat crisp) Chop in half and discard core and seeds. With a knife, scrape the outside of the chile till the blackened portion mostly peels away.

Chop the chilies into large pieces and place into bowl of food processor. Add the garlic, cilantro, pine nuts, olive oil, salt, and vinegar. Process until mostly smooth. Taste to see if you want to adjust flavor with more salt, olive oil or vinegar. Refrigerate until ready to use.

pesto6

...I'm off to go work on my house some more...


rox

Sunday, July 18, 2010

#19 Redneck with Money Grilled Cheese


I was reading the New York Times "100 ideas to grill" list. One of them was a "grilled" grilled cheese with an artisan bread and "good quality cheese." I set out then to the Cooper Young Farmer's Market on Saturday to get some artisan bread and my usual local produce. While browsing, I got to thinking. I like fancy cheese but for a grilled cheese, my favorite will always be...don't judge...Velveeta. Yes, that's right. And when I think Velveeta, I can't help but think Rotel. So this is how this sort of upscale trailer park sandwich was born.

While at the Cooper Young Market, I picked up some roma tomatoes and mild peppers (that would be the "rotel" part of this sandwich)

and some of my favorite potatoes from Downing Hollow Farms...more on the potatoes later. And also got a watermelon to round out the meal. We'll start with the sandwich part:

Red Neck with Money Grilled Cheese Yield 3 sandwiches
1 "artisan" loaf of bread, I picked up Ciabatta from Sweet Grass
2 medium roma tomatoes, diced and blotted dry with paper towel
3 - 4 small mild peppers, diced (or hot ones if you like a kick)
1 T melted butter
1 bag of shredded Velveeta, or the block style would be fine and maybe even easier

Cut the bread into sandwich slices and butter the outside (or inside too if you want).

Heat grill to about 350. Put the buttered crust side down on the grate and then load up the facing bread with the cheese, peppers and tomatoes.


Close lid but stay with it, this won't take long and you don't want the bread to burn--the butter and cheese will cause some flare ups. When cheese just starts to melt, move them to top rack of grill. Let melt almost thoroughly then remove from grill. Using clean dish towel, cover the sandwich and then press down flat with your hands. Let the sandwich rest about 5 minutes before serving so the cheese can firm up a bit. Oh my was this good.


Now for the potatoes. This is a Nigella Lawson recipe I've been doing for ages. Yield: 4 generous servings
2 lbs of potatoes, 1/2" dice (the Downing Hill Farms ones might have been a combination of fingerling, red and yukon golds. I couldn't really tell but they were sooo good.)
1 T or so of olive oil, I use the bare minimum of oil
1 whole bulb of garlic, cloves removed but paper on the cloves in tact
sea salt to taste
pepper to taste

Preheat oven to 425. Local potatoes are dirty, so wash them really-really well. (This is because see, they aren't run through a factory a hundred times. It's earth to farmer's market around here.)


Cut them in the 1/2" dice, leave skins on.

Put in a big roasting pan. Put in the garlic cloves (paper on), sea salt, pepper and olive oil in the pan with the potatoes and toss to coat.


Roast for an hour or so tossing every 20 minutes till golden. The garlic roasts skin on with the potatoes and it's fun to squirt the skins open and get that yummy roasted garlic goodness when you eat this dish.

So here, we rounded out the meal with some watermelon cutely cut with my little mini-ice cream scoop and it was a sensational meal. I think even the New York Times would agree.


toni

Saturday, July 17, 2010

Lagniappe - Summer Dessert Kebabs


When it's hot outside and you just want a simple and light dessert, here's an idea. Do some fun fruit skewers like these. They have sort of a wow factor don't you think? And the best part, no cooking required. This is purely an assemble only dessert.

Summer Dessert Kebabs

Sorbet of your choice (I used this Coconut one by Ciao Bella that is perfection if you like coconut.)
Fruits of your choice. Here, I used sliced bananas, fresh pitted cherries and fresh blackberries.
A bite of chocolate or a bite of a decadent cookie, your choice.
Some fun skewers like the ones pictured here that I got at Party City or just plain bamboo ones broken in half.
Glass dessert bowls, frozen.

1) Put the dessert bowls in the freezer.
2) Scoop the sorbet in little round balls with a mini ice-cream scoop and place on baking sheet. Put sheet in freezer and freeze until rock-hard (several hours).
3) Immediately before serving your dessert, get all your berries & bowls and such "mis en place" or in it's place. Sorbet melts quickly so you can't be running around the kitchen.


4) Stab away in whatever order you want. I only made six here (two each for three people), but if you have a larger crowd, you will want to return the bowls to the freezer as you go.
5) Wow your company.


toni

Wednesday, July 14, 2010

Lagniappe - Banana Pudding


In the June 2010 Issue of Southern Living, they featured a "lightened up" recipe for banana pudding. It was sensational; although it featured a meringue topping which to me means "winter dessert" as I prefer whipped cream any other time of year (guess that's not "light" then). Then, my beloved August/September issue of Cook's Country also featured a very decadent banana pudding recipe. I really liked the Southern Living take and didn't feel the need to stray, but there was one part of the Cook's Country version that spoke to me...roasting some of the bananas and then processing them in the vanilla based pudding to give a depth of banana flavor in the pudding part. So here, I present an adaptation of both recipes for quite possibly the best banana pudding you will ever eat.

Banana Pudding (serves 9)

5 bananas, firm. Yes, must be firm and no spots at all. (two will be roasted, three eventually sliced)
1 t Fruit Fresh* divided or fresh lemon juice
1/3 c flour
pinch of salt
2 1/2 cups of milk (1% is fine)
14 oz. can fat free sweetened condensed milk
2 egg yolks
2 tsp. vanilla extract
Box of vanilla wafers**
Whipped cream

Preheat oven to 325 and put two of the in peel bananas on a baking sheet. Roast them till they are black, about 20 minutes. Cool slightly then peel.


Meanwhile, make the pudding. Whisk constantly the flour through egg yolks in a heavy sauce pan and heat till thick and bubbly. Remove from heat and add vanilla extract. Let pudding base cool slightly.

At this point, slice the remaining 3 bananas and toss in a bowl with 1/2 tsp of the Fruit Fresh or the lemon juice (this will keep bananas from turning black. Ewww!)

Then using a food processor, put the two roasted bananas in there with 1/2 tsp of the Fruit Fresh or some lemon juice and puree. Then add the pudding base in there and pulse till blended.

Next,in a 9x9 glass pan or similar, layer the desert in a cookie, pudding, banana slice fashion.


Go crazy with the cookies...that's the best part. There is no shame in using the whole box, although I usually have a few left over. Cover and chill for at least 6 hours. Serve with whipped cream.


* Cook's Country used lemon juice to retard the oxidation process of bananas turning dark and looking un-appetizing. I didn't have a lemon around so I used Fruit Fresh. This product is found in the canning/freezing section of the grocery store.
** If you have an aversion to "soggy cookies," Cook's suggests that you chill the pudding base about 45 minutes before the cookie assembly. This is up to you. To me, mushy cookies is part of the comfort food feel of a banana pudding.

toni

Monday, July 12, 2010

#18 Black & Blue & a little sugar too

pie10

I’ve been jonesing for a pie for a while – haven’t made one all summer and figured this was the perfect time. Specifically my sister-in-law was asking questions about the recipe just days before and wanted to do a little experimenting. The idea was originally for blueberry, but saw that blackberries were $10 for $10 at the store. …so there birthed the idea of a Black and Blue pie.

There’s a big debate between what’s a better pie crust – butter or shortening. I’ll just tell you flat-out – butter just tastes better. I don’t care what’s the flakier crust. My crust recipe always turns out beautiful and delicious. Just remember to brush it with the egg/cream wash and a sprinkling of sugar on top before putting it in the oven. Here’s the apple pie I made last year using the same recipe:

pie14

This pie crust will take no more than 5-10 minutes. Do it all in the food processor then empty out onto plastic wrap. It’ll form into a ball inside the plastic (just wrap it tightly). ..then chill for an hour and you’re ready.

pie1b

pie2


pie3


Pie Dough
This pie dough is good for 2 crusts (top and bottom) and for a 10” pie. If you’re using a 9”, there will be some dough leftover

2 1/2 cups all-purpose flour
1 tsp salt
1 tsp sugar
1 cup (2 sticks) unsalted butter, chilled and cut into small pieces
1/4 to 1/2 cup ice water

In a food processor, combine flour, salt, and sugar. Add butter, and process until the mixture resembles coarse meal, 8 to 10 seconds. With the machine running, add ice water in a slow, steady stream through the top. Pulse until dough holds together without being wet or sticky; be careful not to process more than 30 seconds. To test, squeeze a small amount together: If it is crumbly, add more ice water, 1 tablespoon at a time.

Divide dough onto 2 sheets of plastic wrap. Wrap in plastic and form into ball. Flatten into disk so it’s easier to roll out later. Place with pie plate in fridge to chill at least 1 hour. Dough may be stored, frozen, up to 1 month.


-----------------------

Now here’s the Black and Blue pie recipe. I tried experimenting with the temperature and learned that it really needs to be 425. If you have a pie edge cover, use it – but just keep an eye on the pie. Once it’s browned to your liking, cover the top with a piece of foil. I would say let it cook for a solid 30 minutes then continue to check it in 10 minute intervals. It’s as simple as that. I tried reducing the temperature and the top just didn’t brown as much.


…now on for the other tip (which I didn’t follow this time unfortunately). tapioca
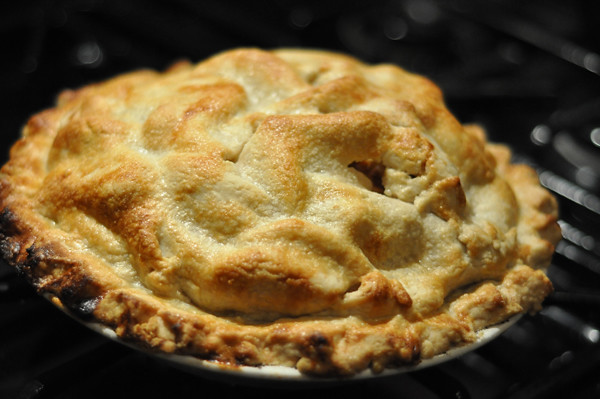
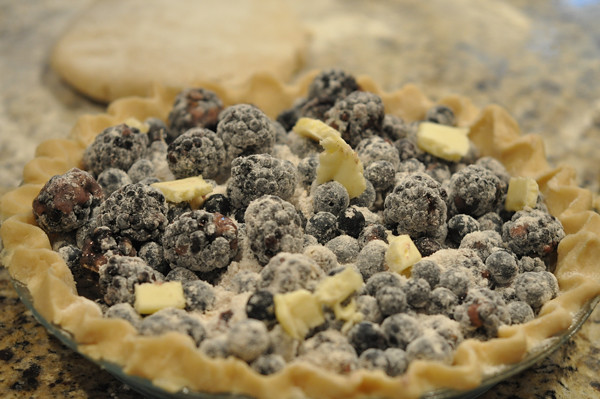
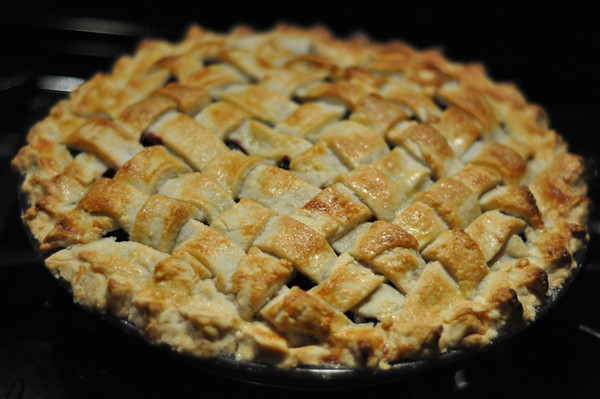
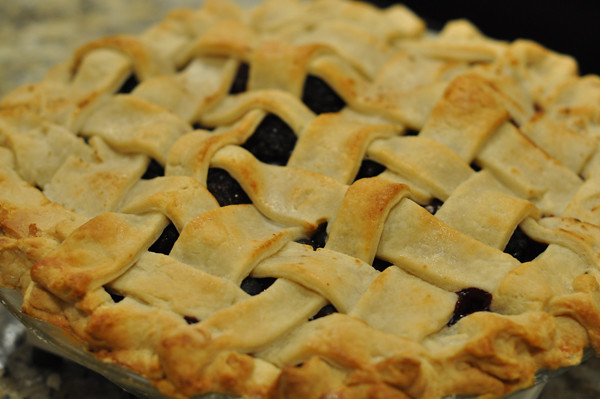
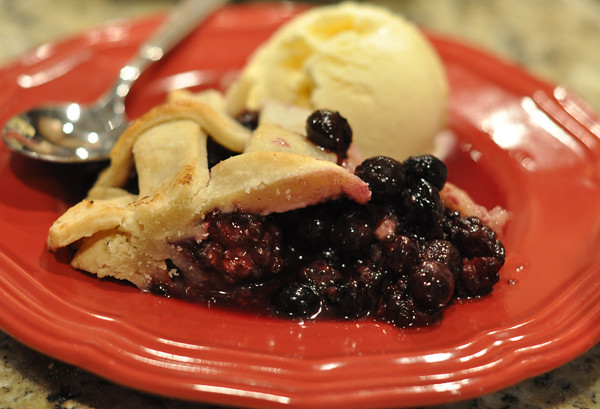
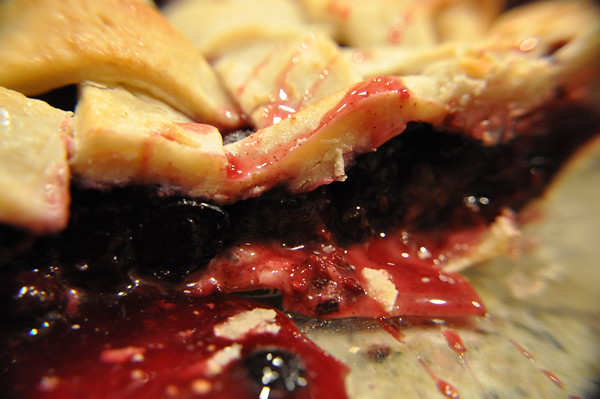
When it comes to a runny berry pie, the first key is for it to cool completely if you’re using cornstarch. I can never wait that long, so I usually end up with runny slices. The cornstarch is really finicky and needs time to set after it comes out of the oven. I’ve researched and found a way around that. It’s tapioca. I didn’t use it in mine, but have done it before and can guarantee I’ll use it next time. I’ve added it to the recipe below.

pie8

pie7

pie6


Black and Blue Pie
3/4 cup white sugar
1/4 cup quick-cooking tapioca (not pudding)
1/4 tsp salt
1/2 tsp ground cinnamon
1 lemon zest
2 cup fresh Blueberries, 2 cups fresh Blackberries (or just 4 cups fresh blueberries)
Pie crust recipe above
1 Tbls butter
1 egg
1 Tbls cream or Half & Half
1 Tbls sugar

Preheat oven to 425 degrees. Gently mix sugar, tapioca, salt, and cinnamon, lemon zest and blueberries/blackberries. Set aside.

Roll out pie crust and line pie. Pour berry mixture into the crust, and dot with butter. Cut remaining pastry into 1/2 - 3/4 inch wide strips, and make lattice top. Crimp and flute edges.

After you’ve finished assembling, brush with an egg wash of 1 egg and cream. Then dust with sugar to give it a sweet hard crust. Place on the lower rack of the oven and cook for 50 minutes. Cover with foil when brown. Let cool before cutting.

pie4


I unfortunately didn’t have the egg and coupled with me playing with the temperature, it didn’t brown as nicely.


Here’s the pie I made last year using my directions above. …and next to it is me trying to make erroneous changes and mess it up...


pie13pie12


In any effect, it was still delicious. Note that i should have used the Tapoica pearls, but had to give cornstarch 1 last try....

pie11

pie9

rox